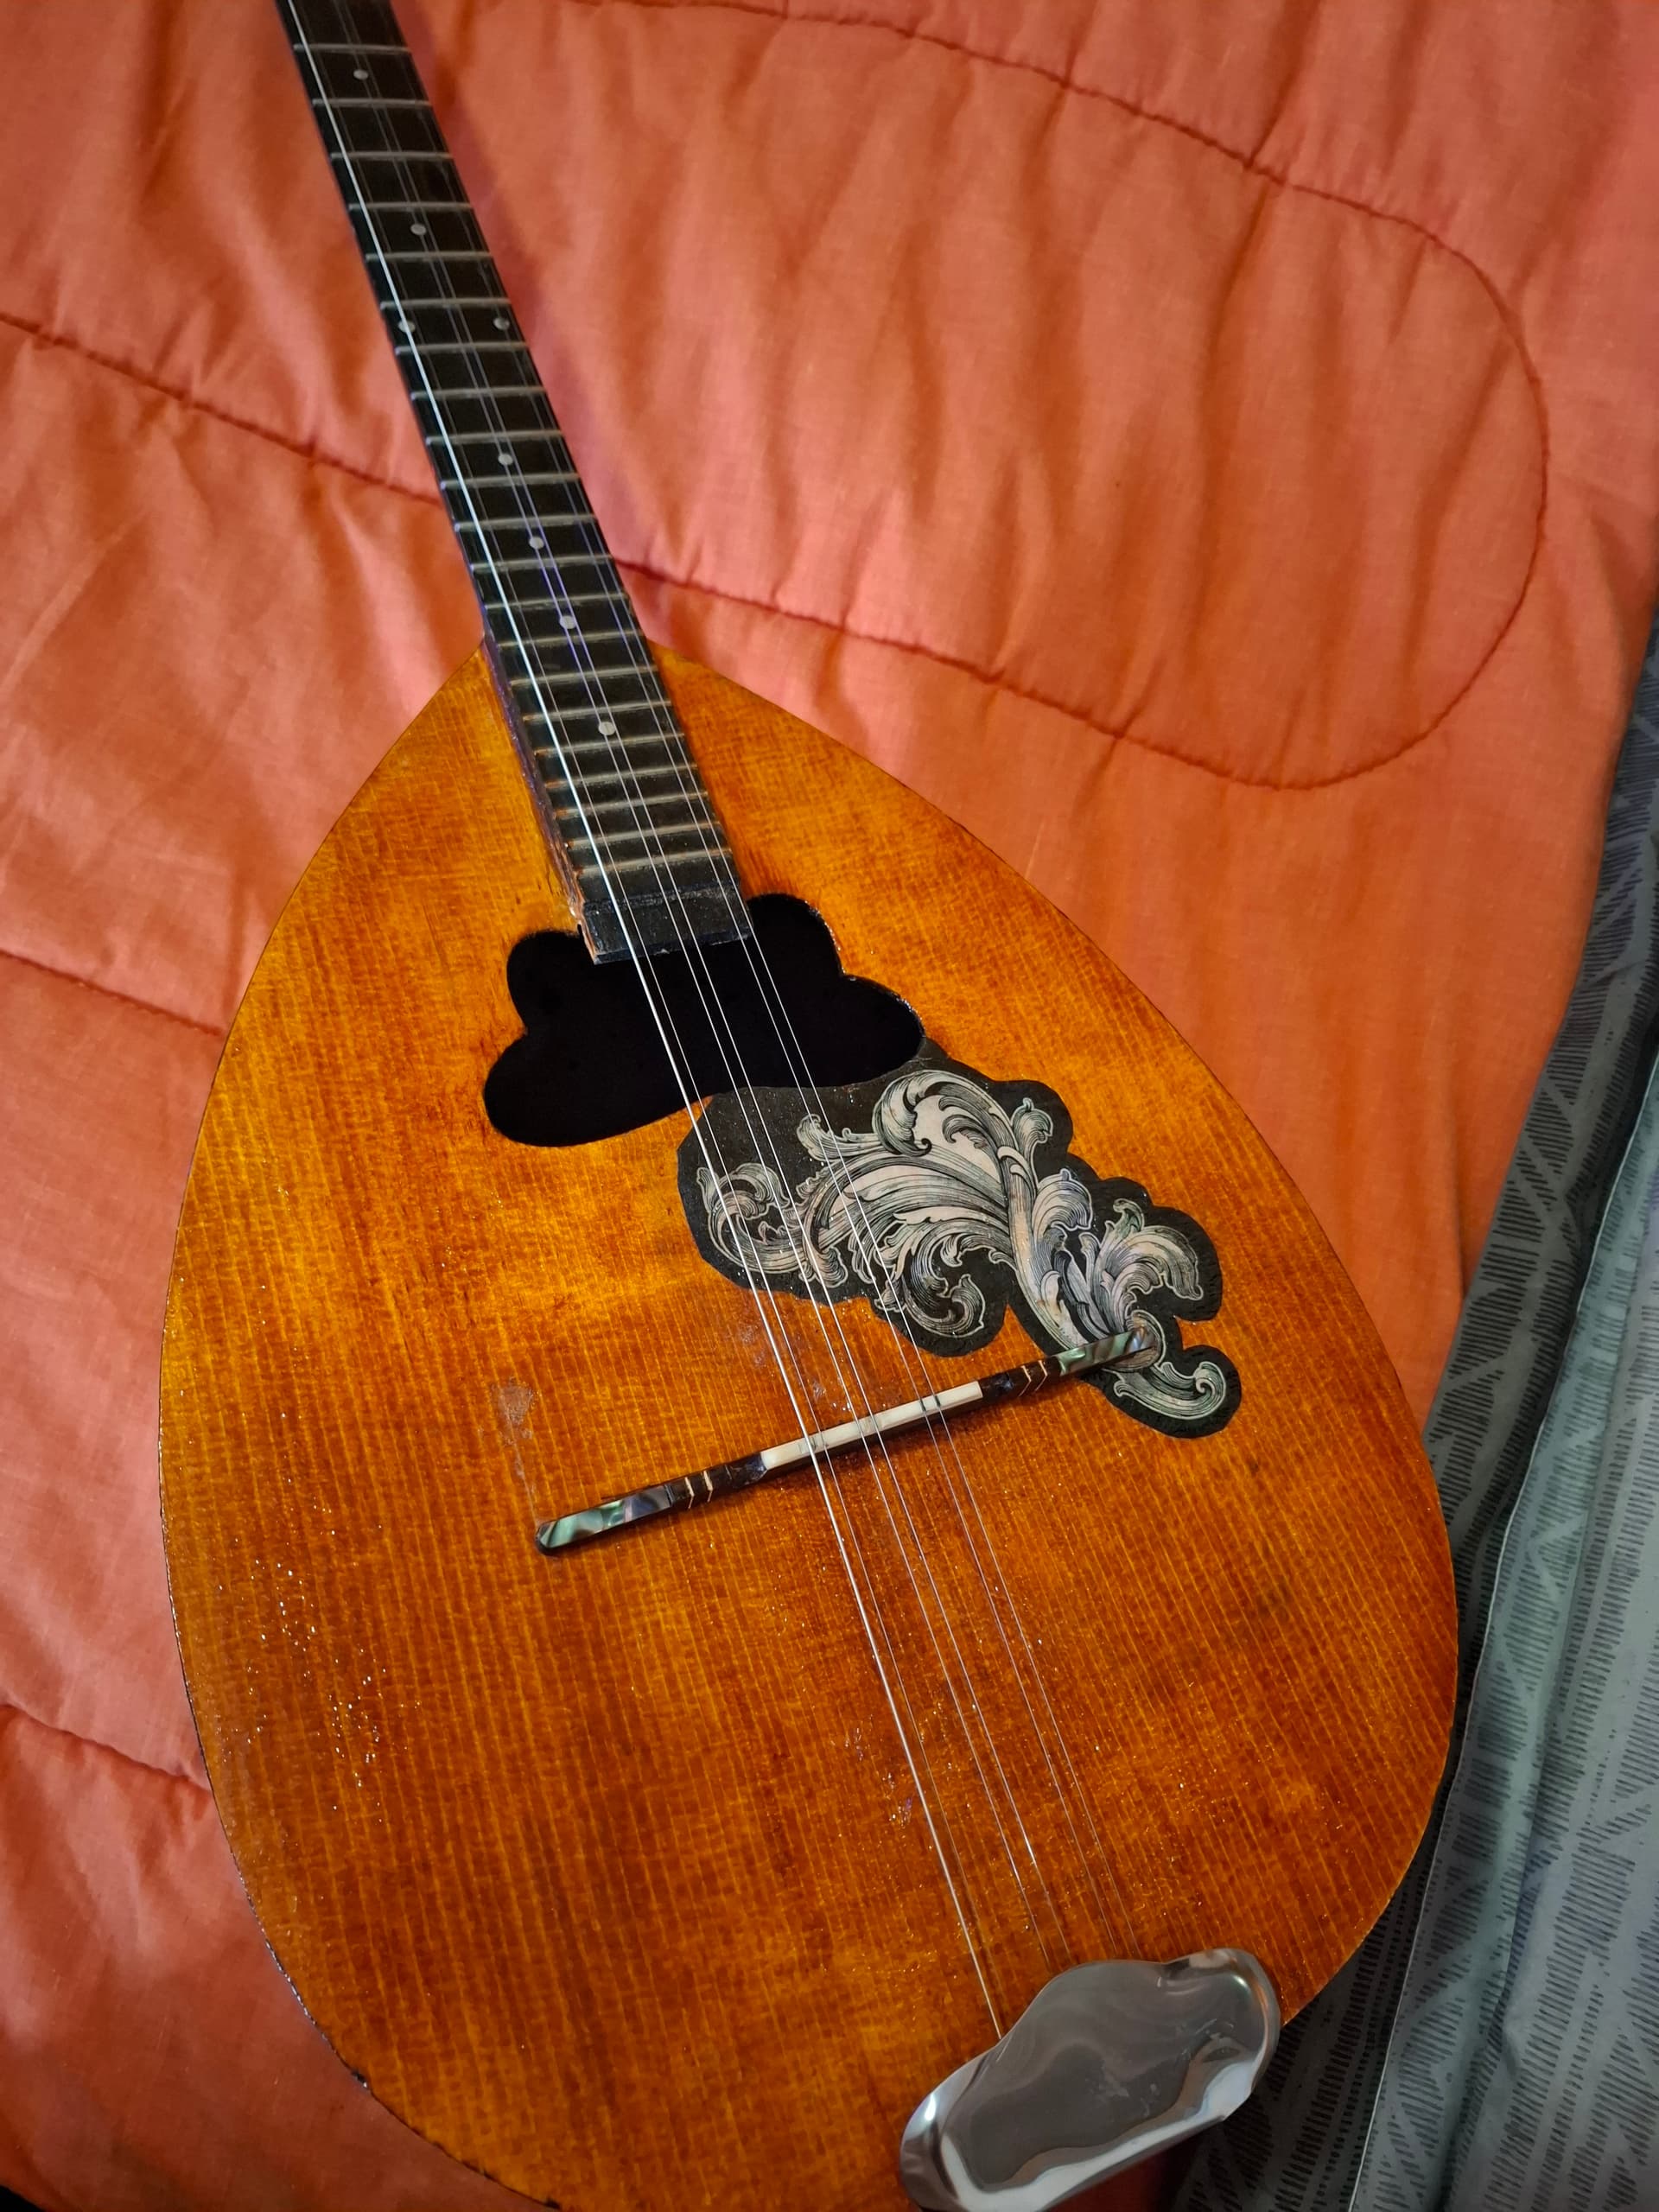
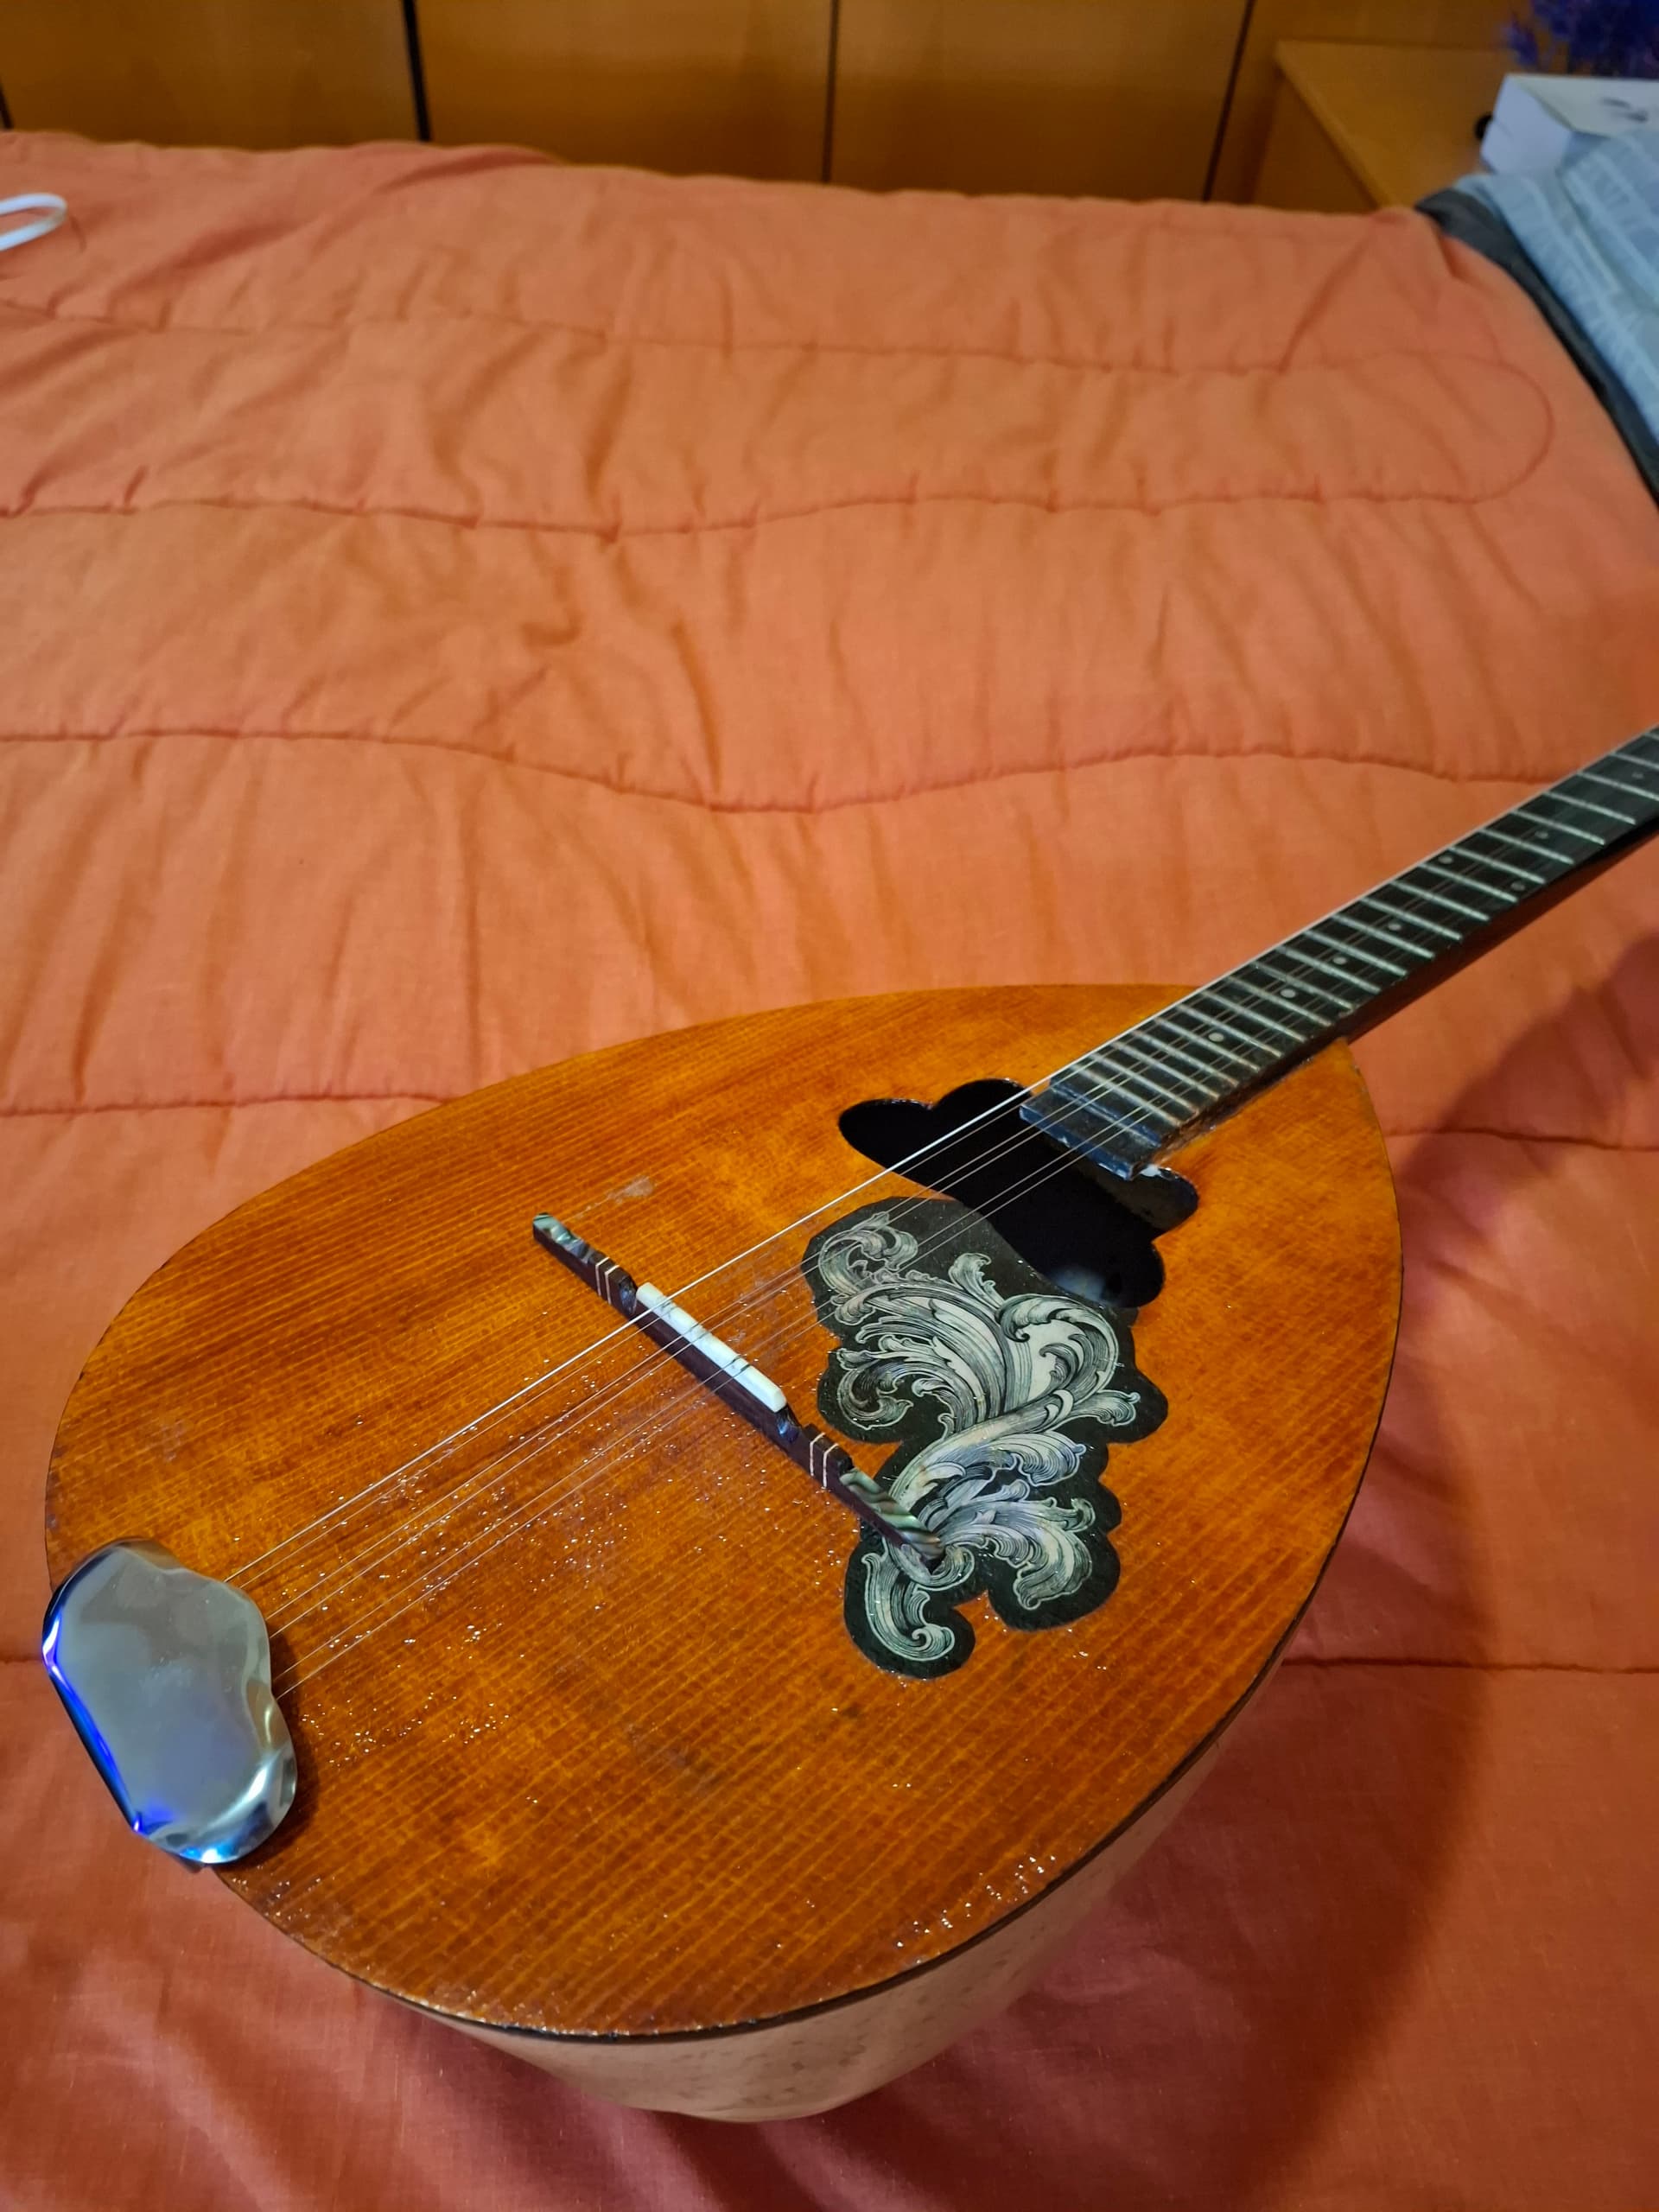
Good evening, everyone! Sorry for the wait! Indeed, in my opinion, the instrument “breathes” better. Before I went off to do my military service, as I mentioned above, I sanded it with sandpaper (very fine, so we wouldn’t remove too much thickness from the top), and the paper came off. To my eyes, without the paper, the top looked like a normal two-piece top, rather than OSB or plywood (that’s what we call the wood used for plasterboard and temporary constructions in Cyprus; I don’t know what you call it back home!). And without having any experience with timber (although I’d very much like to, and that’s what I’m working towards), it looked perfectly fine and very ordinary. It certainly wasn’t anything special.
The instrument was then cleaned with compressed air and a hairdryer to remove the dust, as well as with a slightly damp cloth, just to put our minds at ease.
After cleaning it, I applied a coat of thinned varnish that was slightly reminiscent of padouk.
As for the design, I went to the craftsman next door, the wonderful Mr Leonidas Spanos here in Dali. After a great deal of enthusiasm and conversation about instruments (I wholeheartedly recommend visiting him if you have the opportunity; he’s fantastic both as a person and as an instrument maker), he gave me some advice about the design.
So we settled on the “Transfer” method (we’ll call it that for convenience):
First, we find a design we like online, preferably one that is monochrome (Monochrome / B&W).
We remove the background (if there is one) and edit it in whichever design programme we prefer (I prefer Illustrator, but I’d suggest looking at it from a… pirate’s point of view if you’re interested…)
Once we’ve finished editing and are happy with the design, we can add the black outline, which will essentially be our penaria. When the design is ready, we can print it (always using the highest-quality settings), measure it, check the size again and print it again if we didn’t get it right.
Next, we cut out our design / penaria and can place it on the top. Then we take ordinary white craft glue, the kind given to children in primary school and nursery school, etc. In Cyprus, the well-known brand is Foska. This glue has a very useful property. When we apply it over the paper with a brush and spread it out, any part of the paper that has no ink dries transparent. This allows us to create very artistic designs without having the tools or the knowledge required to make them.
Then we move on to the finishing stage. The top didn’t receive any varnish apart from the padouk-coloured one, which already has protective properties. The top reached its final stage after being sanded with 2000-grit wet-and-dry sandpaper (WITHOUT water — and this is very important!!!), until we achieved the desired finish. Then the strings, bridge, tailpiece, etc. were fitted, and it was ready.
This method isn’t well known; it’s an easy “solution” which, for me, helps prevent us from affecting the wood of the top. I also realise you’ll say to me, “But you’ve gone back to the initial stage, with the paper.” The glue dissolves the paper, leaving only the design on the wood in a very thin layer. Think of those tacky temporary tattoos we used to get at fairs when we were little — that’s exactly what happens here.
In any case, the instrument breathes, and the sound is vastly better. Sorry again for the delay. I hope I’ve answered your questions; I’ll also include some photos of the instrument.
Ah! Did I mention that we also made it a three-string instrument?